Before any fabric gets cut, sewn, or hung, everything starts with the window itself. Getting an accurate window measurement is the single most important step in the whole curtain process — it’s what separates a crisp, tailored transformation from curtains that never quite sit right. Here’s exactly how to measure a window properly, using a real before-and-after project as an example.
The Starting Point: What You’re Working With
Before you pick up a tape measure, take a good look at the window itself and note down:
- Window type — single pane, sliding door, French door, bay, or a run of multiple panels like a glass wall.
- Frame material and depth — aluminum, timber, uPVC — this affects how deep your recess is and whether an inside mount is even possible.
- Ceiling height above the window — if there’s a gap between the top of the frame and the ceiling, you have room to mount higher and make the window feel taller.
- Obstructions — light fixtures, ceiling downlights, wall corners, or return walls near the window that might limit how far your track can extend.
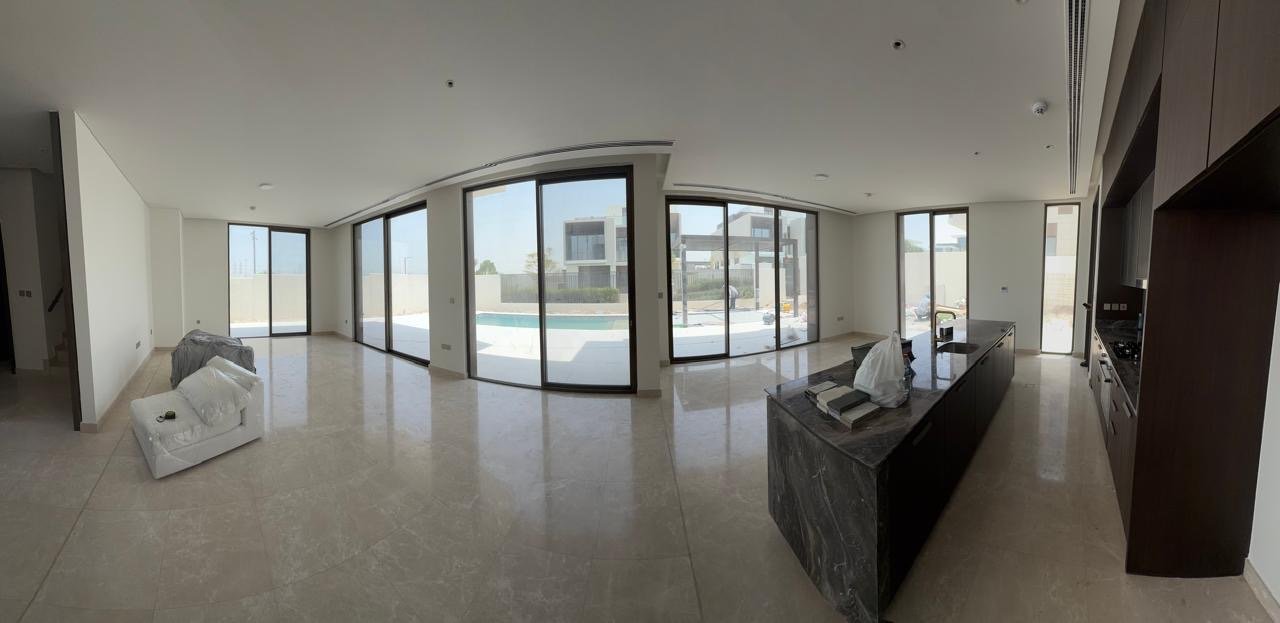
In the project pictured here, the “before” shot shows a wide run of aluminum-framed sliding glass doors spanning nearly the full wall, with a clean ceiling line and no major obstructions — ideal conditions for mounting a track close to the ceiling for a seamless look.
Step 1: Measure the Window Frame Width
Run your tape measure horizontally across the frame at three points — top, middle, and bottom — and record the widest measurement. Frames aren’t always perfectly square, so always work from the largest number.
For a run of multiple windows or door panels like the one shown, measure:
- The width of each individual glass panel
- The width of each mullion or post between panels
- The total width from the far-left edge to the far-right edge of the entire run
This total run measurement is what tells you how long your track needs to be.
Step 2: Measure the Window Height
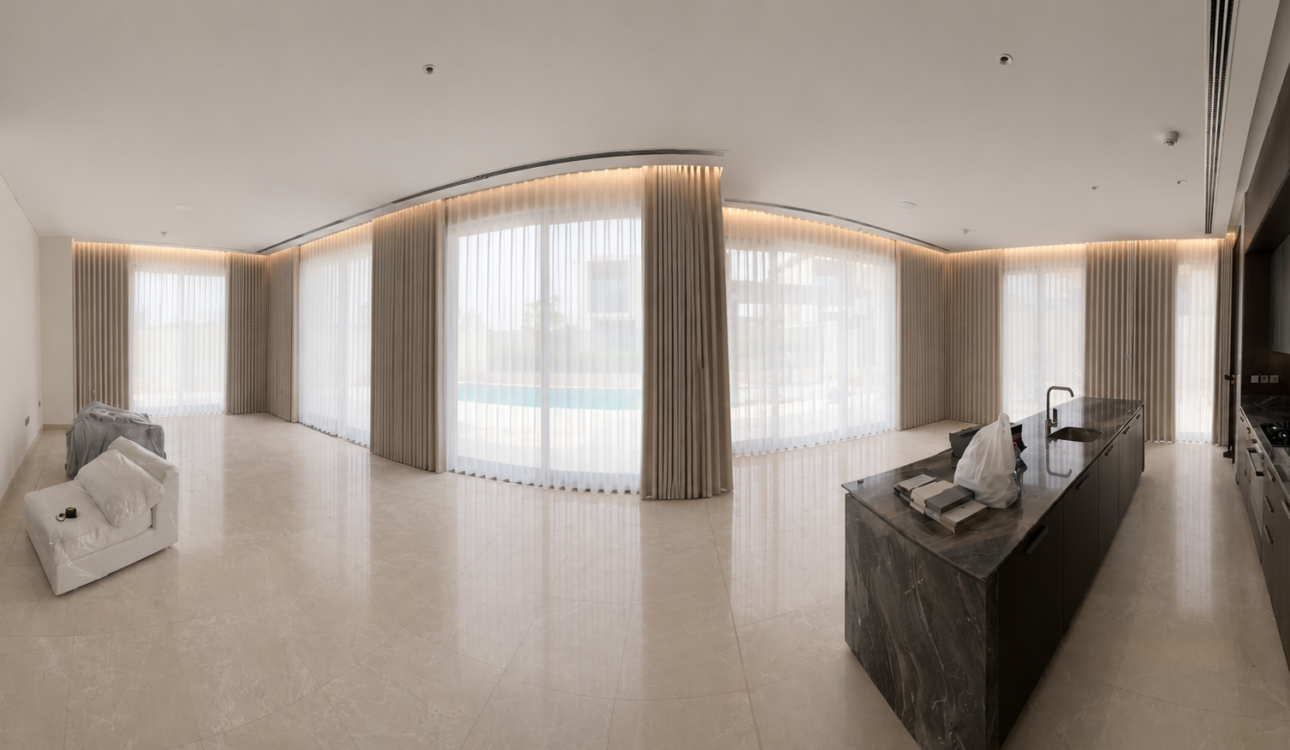
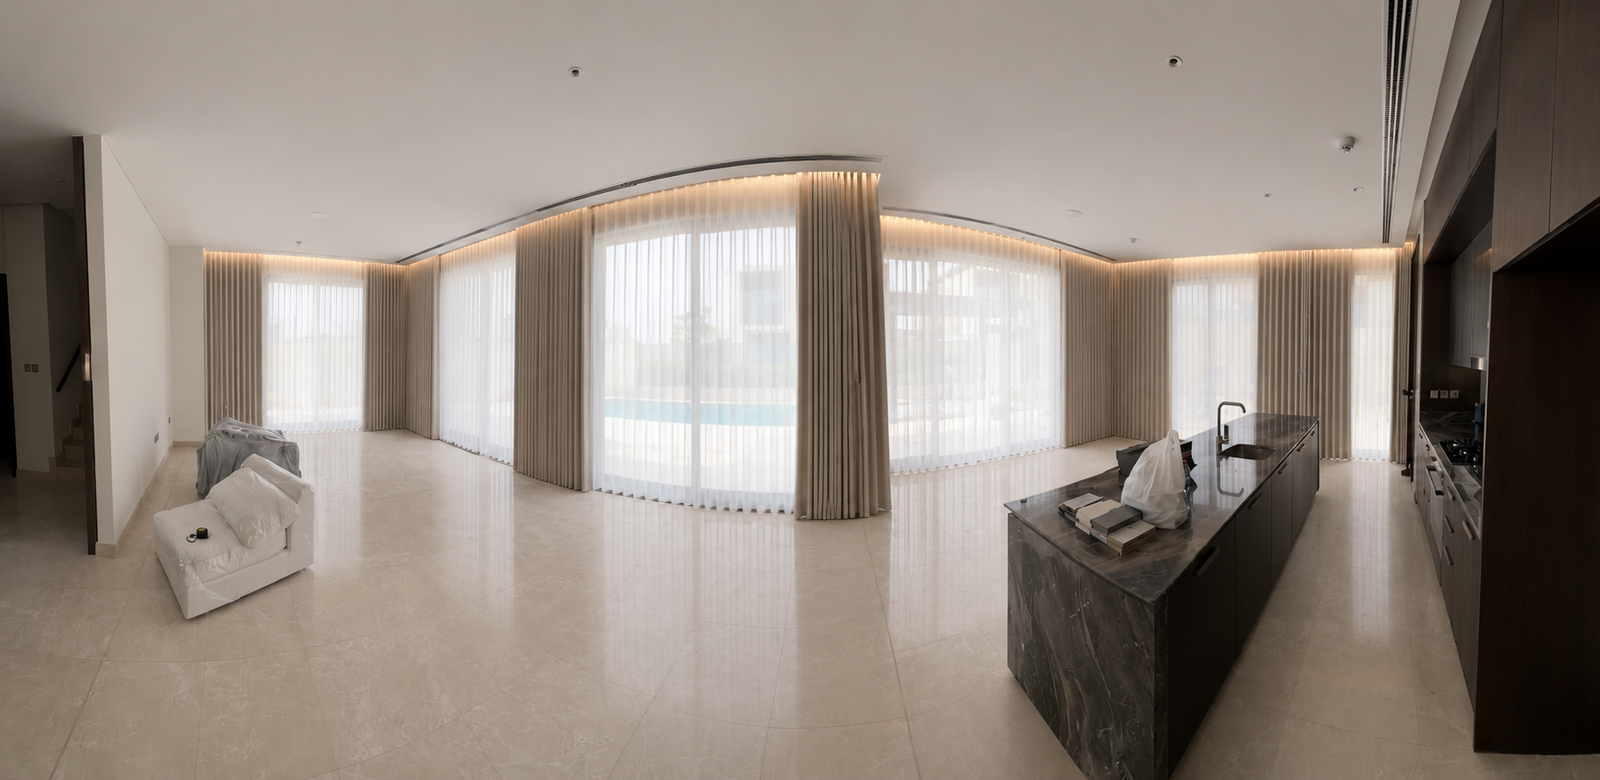
Measure vertically from the floor to where you intend to mount the track — not just to the top of the window frame. In the “after” photo, the curtain track is mounted almost at ceiling height with a recessed cove that hides the track entirely and washes the curtain in soft light. That decision was made possible by measuring the full ceiling-to-floor height early on, not just the frame height.
Measure at both ends and the center of the run — floors and ceilings are rarely perfectly level, especially across a wide span, and a few millimeters of variance can throw off an otherwise perfect installation.
Step 3: Note the Recess and Mounting Surface
Check how much flat wall or ceiling space exists above and to the sides of the window:
- Above: Is there a bulkhead, cove, or flat ceiling where a track can be recessed or surface-mounted?
- Sides: Is there wall space beyond the frame for the curtain to stack back on when open, without blocking the glass?
In this project, the ceiling had a curved cove detail that the track was fitted into, allowing the curtain to hang from a hidden channel with lighting built in above it — something only possible because that ceiling detail was measured and accounted for at the start.
Step 4: Record Everything in One Place
For a multi-panel run like this, don’t just note a single width and height. Sketch a simple diagram of the wall and record:
- Total width of the run
- Height at each end and the center
- Position of any posts, mullions, or breaks between panels
- Distance from the ceiling to the top of the window frame
- Any fixed obstacles (lights, vents, corners)
This becomes the reference your curtain maker works from, and it’s what determines the track length, the number of panels, and how the fabric will fold and stack once open.
Step 5: Double-Check Before Fabrication
Once your track style and mounting height are chosen, remeasure at that exact point. Measurements taken during construction or before finishing work can shift slightly once flooring, skirting, or ceiling details are completed. It’s worth the extra ten minutes to confirm before fabric is cut.
From Bare Glass to Finished Room
The two photos here tell the whole story. The “before” image shows the raw window run — functional, but exposed, with no softness or light control. In the “after,” the same wall is dressed with sheer wave-heading curtains that trace the curved ceiling line perfectly, paired with cove lighting that highlights the fabric’s texture at night. None of that precision — the way the curtains follow the curve of the ceiling, the way the track disappears into the recess — happens without accurate measurements taken at the very start.
Quick Reference Checklist
- [ ] Measure width at top, middle, and bottom — use the widest
- [ ] Measure height at both ends and center — use the tallest
- [ ] Note recess depth and mounting surface
- [ ] Check for obstructions (lights, vents, corners)
- [ ] Record stack-back space on each side
- [ ] Sketch the full run with all measurements labeled
- [ ] Remeasure just before fabrication begins
Getting these numbers right the first time is what allows for the kind of finish shown in the after photo — a curtain that looks like it was designed for the space, not added to it afterward.